Menu Commands
Contents
- 1 QSY
- 2 Change period
- 3 Change mode
- 4 Keyboard mode
- 5 CW speed
- 6 Carrier
- 7 Pass frequency for current band
- 8 Pass frequency for any band
- 9 Take a sked
- 10 Pass a station
- 11 Receive QTC
- 12 Send QTC
- 13 Turn Antenna to Logged Call (Short Path)
- 14 Turn Antenna to Logged Call (Long Path)
- 15 DX cluster
- 16 Spot
- 17 CW messages/Digi messages
- 18 Operator login
- 19 Station type
- 20 Remote commands
- 21 Live score
- 22 Antenna selection
QSY
Next lower band
Shortcut: [Alt][F1]
Changes the band of the active radio to the band below, in terms of frequency.
When pressing the key on the lowest band allowed for the active contest, the highest band will be selected.
If the radio is on a band which is not allowed for the active contest, an allowed band will be selected when pressing the key.
Next higher band
Shortcut: [Alt][F2]
Changes the band of the active radio to the band above, in terms of frequency.
When pressing the key on the highest band allowed for the active contest, the lowest band will be selected.
If the radio is on a band which is not allowed for the active contest, an allowed band will be selected when pressing the key.
Jump to band using text command
Band and frequency changes can be made by typing the frequency in kHz or band in meters in the callsign entry field.
- Typing 20 into the log callsign entry field and pressing
[Enter]will change the active radio to the 20m band. - Typing 14020.5 into the log callsign entry field and pressing
[Enter]will change the active radio to 14020.5 kHz exactly.
Change period
For contests that are split into several time-defined periods, this option is used to manually switch between periods.
Periods can be changed on active QSO and also on previously logged QSO.
Note: this option will only be shown if the current contest has configured periods.
Period before
Shortcut: [Ctrl][F10]
This will change the period on the active or edited QSO to the previous period.
- If the contest is split into four time defined periods and the period set in the QSO is #3, pressing
[Ctrl][F10]will change this QSO to period #2. - If time period is #1, this will change the time period number to last one. eg if 4 periods pressing
[Ctrl][F10]will change this QSO to period #4.
Period after
Shortcut: [Ctrl][F11]
This will change the period on the active or edited QSO to the next period.
- If the contest is split into four time defined periods and the period set in the QSO is #3, pressing
[Ctrl][F11]will change this QSO to period #4. - If the time period is #4, this will change the time period number to first one. eg if 4 periods pressing
[Ctrl][F11]will change this QSO to period #1.
Change mode
Mode before
Shortcut: [Ctrl][F1]
Selects the previous mode in the list of allowed modes for the currently active contest.
Mode after
Shortcut: [Ctrl][F2]
Selects the next mode in the list of allowed modes for the currently active contest.
Keyboard mode
Shortcut: [Alt][K]

Activates the CW/RTTY keyboard transmission window.
- Everything typed in the CW / RTTY keyboard window will be transmitted instantly as CW or RTTY depending on active mode.
- To stop transmission instantly, press
[Esc]. - To close the entry window, click Close, press
[Enter], or[Alt][K]
Use this option for a quick chat.
CW speed
Shortcut: [Alt][V]
![]()
This option allows the operator to quickly change the CW keying speed to a desired WPM speed.
The CW speed for the currently focused radio can also be changed using the shortcut keys:
[Alt][F9]to decrease the speed by 2 WPM[Alt][F10]to increase the speed by 2 WPM
Each radio has its own speed setting in SO2R and SO2V if the option Options|CW/Digi|Enable different R1/R2 speed is checked.
The CW speed window will only change the speed of the radio in focus, to change the CW speed for the radio not in focus use the shortcut keys:
[Shift][Alt][F9]to decrease the speed by 2 WPM[Shift][Alt][F10]to increase the speed by 2 WPM
Carrier
Shortcut: [Ctrl][T]

Keys the radio for tuning the radio and/or the power amplifier.
To exit, click Stop, press [Enter], or [Alt][K]
Pass frequency for current band

Pass a frequency for the current operating band, this will be shown in the Status window under the Pass column

Pass frequency for any band
Shortcut: [Alt][P]
Pass a frequency for any band, this will be shown in the Status window under the Pass column
Take a sked
Shortcut: [Alt][E]
Add a Sked to the Sked Window.

Right click on Skeds Window for Adding, Editing, and Deleting Skeds.
The menu also offers options for sorting, and display font, colors etc.
Pass a station
For SO2R and Multi OP
Shortcut: [Alt][D]
Select Band, Mode or local station you want to pass the station onto.
Add a comment if required.
Click on the Radio of the frequency to pass the station onto, or manually enter a frequency in the Frequency box and mode in the mode box.
[F1]asks for QSY[F2]sends frequency for QSY[F3]sends TU and logs
Clicking Save will alert the networked station by opening the Skeds window (if not already open) and add the details of the station being passed.
Messages can be edited and saved.

- Near Sked in Yellow
- Past Sked in Brown
Right click on Skeds Window for Adding, Editing, and Deleting Skeds.
The menu also offers options for sorting, and display font, colors etc.
Receive QTC
Shortcut: [Alt][L]
Note: this selection will only be visible if the current contest if configured for QTC exchange and the station is eligible to receive QTC.
Enter the received QTC data into this window using the following:
[Tab] moves the cursor between Time, Call and Serial fields and additionally to the QTC number field.
[Tab] also moves to the next entry line when the serial entry is completed.
[Space] will move only within the Time, Call, and Serial fields on the current entry line.
Clicking the mouse pointer in a field will also move the cursor to this field.
When operating on CW, pressing the [Enter] key will automatically transmit an "R" and move from line to line, By using [Enter] everything is automatic.
Using [Enter] will automatically prefill in the two hour digits with the cursor positioned entering the two minute digits.
F-keys have different meaning in the QTC receive window and these can be seen down the side of the QTC receive window,
these allow different situations to be handled during the reception of the QTC traffic.
Pressing [+] or [Keypad Plus] will terminate the QTC exchange, save the QTC data and close the window.
CW Speed can be changed using [Alt][F9/F10] while this window is active.
Repeat QTC in CW
It is possible to ask for a specific QTC row repeat using [Ctrl][F8], this will send the row number with the AGN message.
Editing QTCs
It is possible to edit already entered QTC's at a later time, Go to the QSO where the received QTCs were logged or enter the callsign in the log callsign entry field and press [Alt][L].
The QTC receive window will open with all the data as it was entered, make the relevant corrections and close the window by clicking on the Save button.
Correcting QTCs will not change other information logged against this callsign entry.
QTC receive window state memory
If the QTC receive window is closed, the state of the window is saved in a temporary buffer. Opening the window with the same callsign will restore the state.
The temporary buffer is cleared when a new callsign is used and the QTC receive window is opened.
Send QTC
Shortcut: [Ctrl][L]
Note: This selection will only be visible if the current contest is configured to use QTC exchange and the station is eligible to send QTC.
After this menu option is chosen, additional pop-up menu will be opened.
You can see/choose how many QTC you are able to send and after selection you will have new window opened, with QTC data which are ready for sending.
Turn Antenna to Logged Call (Short Path)
Shortcut: [Ctrl][F12]
If a rotator controller is connected to the network or PC and is setup correctly in Options|Rotator Configuration
then the antenna will turn to the direction of degrees entered into the callsign entry line or to the prefix short path direction.
Turn Antenna to Logged Call (Long Path)
Shortcut: [Alt][F12]
If a rotator controller is connected to the network or PC and is setup correctly in Options|Rotator Configuration
then the antenna will turn to the opposite direction of degrees entered into the callsign entry line or to the prefix long path direction
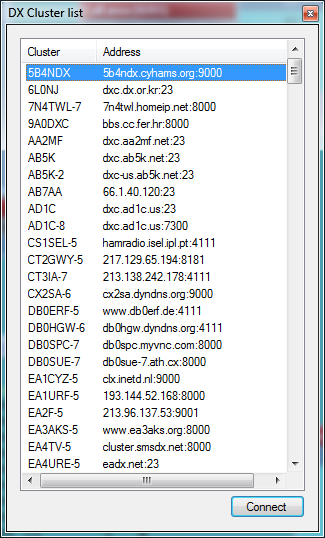
DX cluster
- Connect default
- This menu item connects to your favorite telnet DXCluster as set in the DXC connection list
- To set the "default" connection goto:
Options->DX Cluster->Edit connection list - The DXC connection list window will open, select a node from the list that you want to be the default (or add a new one) and press
DefaultandOK
- Connect other
- You can select a different node from the "default" one by selecting one from the Connect Other list.

- Disconnect
- Send the Disconnect command the the connected DXCluster.
- Talk
- Shortcut:
ALT+T 
- To send text commands to DXCluster node, open the Talk window and type in the command you want to send, or use one of the preset buttons.

Spot
Shortcut: ALT+F3

This option is enabled when a DXCluster is connected or the network is enabled.


After the menu item is selected (or shortcut keys are pressed), the spot window will open with
the predefined text to be sent to the DXCluster as a spot.
The callsign is taken from log callsign entry field, if not blank or if it is blank from the last logged QSO.
CW messages/Digi messages
- Msg F1..F7, INS, PLUS
Shortcuts:F1, F2, F3, F4, F5, F6, F7, INSERT, PLUS
This menu items will transmit the preset messages from the CW/DIGI standard messages data.
In CW/RTTY mode, messages are defined in a textual format.
Initial content of all Fx memories are stored in the loaded contest configuration file.
This can be edited by user with shortcut:[SHIFT][Fx]where Fx is memory which user wants to edit.

For example, by pressingShift+F1the contents of memory F1 will be displayed and the operator can edit the message and save for use.
The contents of all the memories are saved together within the DXLog.net contest log file, so, when the contest file is re-opened, all memories will be active with last edited state.
Additional messages are available from the extra message window that can be opened using shortcut "ALT+C" or menu "OPTIONS"->"CW/DIGI"->"MODIFY ADDITIONAL MESSAGES"
To send these messages you can open the window and press the button on the right according to the message you want to send
Shortcuts:[CTRL][ALT][Fx], where Fx is the function key where the needed message has been stored.
Operator login
Text command: LOGIN/LOGOUT or OPON/OPOFF

This command allows an operators call-sign in Multioperator entry to be logged on and off of the station.
This allows some personal settings to be specified for each operator.
For example you can play specific audio messages in SSB or load a different keyboard setup.
Station type
Setting the type of operation from this position.

It is important to set the correct type of station from the list:
 * RUN - Main Run Station
 * MULT - Multiplier station in a Multi Single setup
 * R1/R2 - Setting for a Multi 2 station setup
 * SUPPORT - Support role only for the station
This setting allows the software to manage the the correct QSY timing/moves under the 10 minutes rule or band change rules of specific contests.
Remote commands
Selecting this command will open the Remote command form:

Select the stations to be sent a command and type the command in the box provided. If the command is to be applied to the commanding station, check the "Apply this command also locally" box.
Live score
This menu enables your contest score to be uploaded to the internet live score server server selected in "real-time"
Select your appropriate category:
File:Live score select category.jpg
Decide how frequently your data is sent:
File:Live score refresh time.jpg
If you want to post to a server other than the cqcontest.net default, select 'Post address' under Setup:
Then enter the full web address of the score server:

There are currently two available services, one which is reached directly, or the other which is reached
through a distributor that uploads to both. It is strongly recommended to use the live score distributor,
since it will post scores on both sites and some contests are only supported by one of them.
| Service | Scoreboard URL | Upload URL |
| Contest Online Score Board | contestonlinescore.com | http://scoredistributor.net |
| CQ Contest (unauthenticated) | cqcontest.net | http://cqcontest.net/postscore.jsp |
| CQ Contest (authenticated) | cqcontest.net | https://cqcontest.net/authpostscore.jsp |
An alternative description on how to set up DXLog to upload to the score distributor server,
see here https://contestonlinescore.com/blog/documents/configuring-dxlog/
If you are using a secure server (https://), select 'Use https' and enter the address in the appropriate box.
If a password is required, enter into the Password box. Click OK to save.
Remember that DXLog uses the station's callsign for authenticated uploads, so if you e.g. are at a club station,
its callsign needs to be registered with a cqcontest.net account.
To post your qso and multiplier breakdown as well as your total score, select the 'Send qso/mult breakdown' menu pick.
To send only your total score, be sure this selection is not checked.
If you wish to auto-post your score, enable automatic data posting by selecting 'Enable auto posting':
File:Live score auto posting.jpg
If you prefer to send the score manually any time you wish you can disable "AUTO POSTING" and just click on "POST NOW!"
Antenna selection

- Change RX
Shortcut: ALT+F11
 This option allows you to change RX antenna whenever it is pressed.
 Currently selected RX antenna is visible in Radio/Ant status window.
 To allow different RX/TX antenna, you need to enable this option in menu Options->Interface specific options->Allow different TX/RX antenna.
 If this option isn't enabled, RX and TX antenna selection will be changed together.
- Change TX
Shortcut: ALT+SHIFT+F11
 This option allows you to change TX antenna whenever it is pressed.
 Currently selected TX antenna is visible in Radio/Ant status window.
 To allow different RX/TX antenna, you need to enable this option in menu Options->Interface specific options->Allow different TX/RX antenna.
 If this option isn't enabled, RX and TX antenna selection will be changed together.