Menu Options
Contents
- 1 Load contest at startup
- 2 Automatic backup
- 3 Language
- 4 Keyboard selector
- 5 CW/DIGI
- 6 Configure interfaces
- 7 Interface specific options
- 8 RTTY configuration
- 9 MK2R/MK2R+/u2R configuration
- 10 OTRSP device pin Setup
- 11 Rotator Configuration
- 12 Configure network
- 13 Network is enabled
- 14 Networking
- 15 DX cluster
- 16 HamCAP
- 17 Data files
- 18 Log
- 19 Windows
- 20 Toolbar
- 21 Restore windows positions
Load contest at startup
- Enabled
If checked last opened log will be opened automatically when DXLog.net is started.
- Disabled
If checked, DXlog.net is started but no log is opened.
Automatic backup
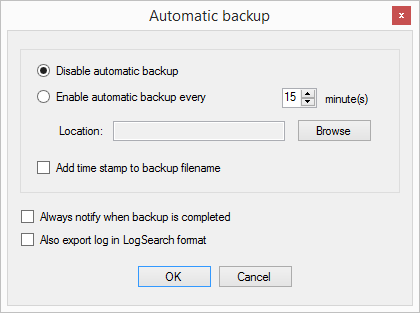
When clicked, this will open the log automatic backup settings window. Here parameters for log automatic backup can be set according to the user's preference.
Language
Choose the log language. The languages available are English, Croatian, Italian, and Norwegian.
Keyboard selector
This option allows the assignment of a different keyboard to each entry line. You (obviously) must have more than one keyboard connected to the PC to use this option.
Select Options -> Keyboard selector. A form opens showing the current keyboard assignment.
Now click on Define. A popup will appear asking you to identify the Radio 1 keyboard.
This keyboard will be assigned to the Radio 1 (upper) log entry line. Press any key on keyboard 1. Now press any key on the keyboard to be assigned to the Radio 2 (lower) entry line. If successful, the form will show some cryptic identifiers for the keyboards. If you really do have separate keyboards ensure that the identifiers are different. It is possible to use one keyboard and assign it to both positions, which will show as the same identifier for both Radio 1 and Radio 2. The form should look something like this:
Now click OK to save your assignments and close the form.
If you find that something doesn't work or need to reset to the default Any Keyboard configuration, open the Keyboard selector form and select the Reset button. Click OK and any previous keyboard assignments will be removed.
CW/DIGI
- No sound
Text command: SOUND / NOSOUND
Turns on or off CW monitor sound.
If smart keyer (WinKey) is configured on any of interfaces, this function is disabled.
- Enable different R1/R2 speed
If checked, different CW speed can be set for Radio 1 and Radio 2.
- Speed
Decrease Shortcut:ALT+F9
Decrease active radio CW speed by 2 WPM.
Decrease other Shortcut:CTRL+ALT+F9
Decrease inactive radio CW speed by 2 WPM.
Increase Shortcut:ALT+F10
Increase active radio CW speed by 2 WPM.
Increase other Shortcut:CTRL+ALT+F10
Increase inactive radio CW speed by 2 WPM.
- Modify standard messages
Text command: MESSAGES / MSGS
This option is used to edit the contents of all standard F, INS and PLUS messages for RUN and S&P mode.
File:Standard messages cw.png
Edited content is saved in currently opened DXLog.net contest file.
File:Standard messages options.png
Options tab allows you to set additional message options:
  $QSOB4 macro

  This text will be sent if $QSOB4 macro is activated in case of dupe qso

  Only use RUN messages

  DXLog.net will use only RUN messages, even if you switch mode to Search & Pounce

  Sprint Exchange Logic

  This setting is applicable only for contests where Sprint Exchange Logic is enabled in config file.

  When this option is checked, if the operator presses the INSERT key, DXLog.net will send the INS message in RUN mode if the
  received serial number field is empty. Otherwise, DXLog.net will only send the INS message in Search & Pounce mode.
- Modify additional messages
Shortcut: ALT+C
Here you can edit additional CW messages which can be called in a F key macro using $MSG1..12.
File:Othercwdigi.png
Content of additional messages are saved in the DXLog.net config file.
- Serial number
Choose serial number abbreviation type when sending serial number during the contest.
Possible options are:
 Leading zeros When checked leading zeros are sent (for example 001 instead of 1).

 Not abbreviated When checked all numbers are sent without any abbreviation

 Half abbreviated When checked all number 0 are replaced with the character T

 Abbreviated When checked all numbers 0 and 9 are replaced with the characters T and N

 Pro when checked all numbers 0, 1, 4, 5 and 9 are replaced with characters T, A, V, E and N
- Shortened spaces (CT spaces)
When checked, shortened spaces will be activated (CT style).
- Remap keys in keyboard mode
When checked, keyboard remapping will be active when sending CW/RTTY text in keyboard mode.
- Work dupes
When checked, QSOB4 message wouldn't be sent if qso is a dupe.
- Speed limits
Allows you to set cw speed limits (fastest and slowest cw speed which can be selected).
- Add spacing when stacking messages
When stacking messages during CW/RTTY contest (pressing for example F5 and F2 keys), if this option is checked one space character will be added between this each message added in the message buffer.
- Use smart double buffer
If Winkey is attached, this option sends 2 characters to the Winkey before waiting for a response, so DXL is always a character ahead of the attached Winkey.
- Enable winkey speed pot
If winkey is attached, this option allows the winkey pot to be used to control CW speed.
- Auto sending
When enabled and the mode is CW, DXL will autosend the INSERT message after 3 or 4 characters of the callsign have been typed into the log callsign entry field removing the need to press the insert key during a QSO.
 For example, you're operating in run mode..
 F1 - CQ TEST G2F G2F
 Now 9A5K is calling you..
 You're typing in callsign field: 9A5 ... as you've typed "5", DXLog starts the INSERT message. in meantime you press K completing the
 callsign..  So DXL will send 9A5K 5NN 001 without pressing the insert key
- Enable smart correction
When checked, DXLog will send only the part of the callsign that was corrected. Example: if you correct W6ABB to W6ABC, only ABC will be sent in reponse to the $CORRECT macro (instead of sending the entire callsign).
Configure interfaces
DXLog.net currently supports interfaces for up to 8 COM ports and one LPT port.
To use any of the ports to connect to the hardware and perform some of the functions, you must enable the port by checking "Enabled" box.
In serial port section, you can select any COM port in range COM1 to COM20.
The only restriction is that you can't select same COM port for more than one interface.
In each serial port interface you can select appropriate device type in combo box in same row.
Each device has additional parameters for setting. You can change them by clicking on Setup button for each interface.
Voice keyer section allows the PC sound adapter to be used to record and play back DVK messages.
To use a printer port (LPT), you must enable it by checking "Enabled" box in printer port group.
Additional data for printer port are configured by clicking Setup in printer port group.
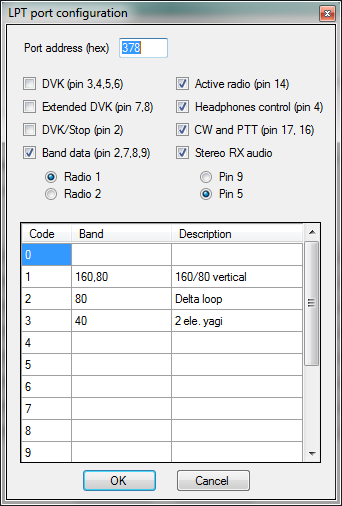
- Radio configuration
If a COM port is configured as a radio interface, click on 'Setup' to open the Radio Setup form. In addition to the generic settings, several radio specific options are available.
- Always use radio DATA mode for any DIGI mode: If your radio has a DATA mode for RTTY/PSK/AFSK, checking this option will force the DATA mode whenever a DIGI mode is selected.
- Don't poll radio during TX: stop polling radio (stop updating frequency, etc.) during transmit.
- Reinitialize port after switching between TX and RX: Upon return to receive, reinitialize the COM port attached to that radio.
These last two options may be useful in cases where RF feedback are causing strange things to happen to a radio. If these options seem to clear up control problems, you may want to investigate adding bonding between the computer and radio(s), and addition of ferrite suppression devices to cables.
Interface specific options
- Allow different TX/RX antenna
If checked this option allows different selection for TX and RX antenna with Operating->Antenna selection menu.
- Use decoder freq correction
If checked and audio decoder is used in digi mode contest, audio frequency in decoder will be added/decreased to cat frequency to get exact frequency for station.
- Prevent TX if another radio on the same band
If checked the Transmitter connected to this DXlog.net will have it's TX disabled if another radio on the network is on the same band.
- Use Split command in SO2V technique
If checked (and the technique selected is SO2V) DXLog will send the Split command to change the transmit VFO. Select this if you are using an Elecraft K3 for SO2V.
- Use different bandmap background for active radio
If checked, the background color of radio 1 or radio 2 bandmap will be changed when the radio becomes active. Note: the color used in this mode needs to be selected by using the Colors menu in the bandmap right click menu. By default it is set to the same color as the normal background.
- Round frequency to nearest kHz when sending from macro
If checked, the frequency sent by the $FREQS, $FREQP, and $FREQnn macros will be rounded to the nearest kHz. If not checked, the frequency is rounded to the nearest 100 Hz. An 'R' is sent between the kHz and 100 Hz digits.
- Radio 1 Transverter Offset / Radio 2 Transverter Offset
Checking either of these selections will open a form that allows you to enter the frequency offset of (usually) the VHF/UHF transverter. Frequency displays will be offset by this value, which can be positive or negative. Note: the resulting frequency must be a frequency in a valid band as defined in the contest configuration.
- Automatically open/close digital window on mode change
If checked, the digital window for the active radio will be opened when a digital mode is selected. If a non-digital mode is selected and the digital window is open, it will be closed. Note that the contest configuration must allow both digital and non-digital modes in the same time period (mixed mode). The digital window must be configured properly in the RTTY configuration form.
RTTY configuration
Settings for RTTY decoder types and paths to decoders
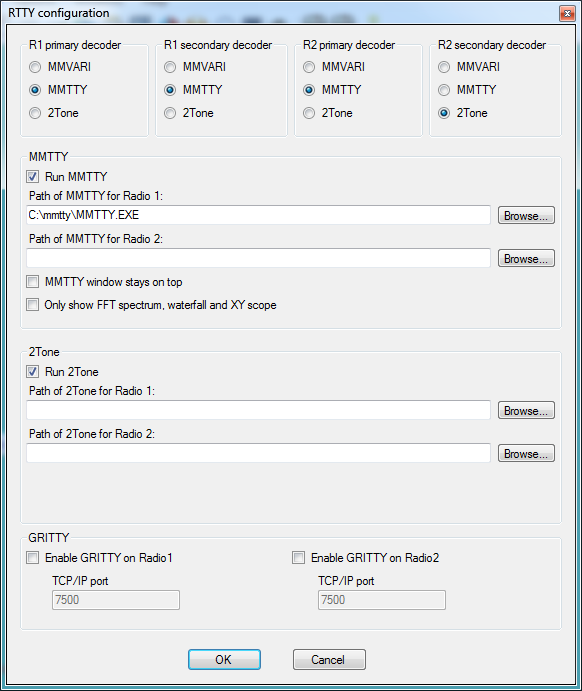
Upto 2 decoders can be utilised per audio channel (radio), set the path to each decoder, decoders must be in different folders on the PC hard disk.
- MMVARI Multimode - For MMVARI select MMVARI from the radio buttons.
- MMTTY RTTY engine - For MMTTY goto http://hamsoft.ca/pages/mmtty.php - download MMTTY engine and extract into a folder on your PC hard disk
- 2Tone RTTY engine - For 2TONE goto http://www.rttycontesting.com/downloads/2tone/ - download the latest 2tone version and extract into a folder on your hard disk
- GRITTY RTTY Decoder - To use VE3NEA's GRITTY decoder then select the tickbox, GRITTY must be installed and running, GRITTY uses it's own decode window, simply click on the callsign required in the GRITTY decode screen and it will be transfered to DXLog callsign input line.
Set the radio buttons for the correct RTTY decoder engine
Set the paths to the relevant RTTY decoder engines
Set tick box options as appropriate for your operation.
MK2R/MK2R+/u2R configuration
Settings for integration with Microham type SO2R controllers
OTRSP device pin Setup
OTRSP pin setup window
Rotator Configuration
DXLog supports rotator control using UDP communications to PSTRotator by YO3DMU and the EA4TX rotator controller. Configuration steps are as follows:
Select Options -> Rotator Configuration from the Option menu. The configuration form will open:
File:PSTRotator DXLog config2.png
Check the "Enable Rotator communication" box at the top of the form.
Enter the required data in each column. Use the Add, Edit, and Delete buttons as required. Here are descriptions of each column:
Band: Value in meters for which this rotator is active.
Ant #: The number of the antenna for this band turned by this rotator, beginning at 1. Antennas are numbered in the order shown on the Radio/Ant Status Window.
IP Address: If you are running PSTRotator or EA4TX on the same machine as DXLog, enter 127.0.0.1. Otherwise enter the IP address of the rotator control server.
Port: The UDP port used to communicate with the rotator interface. Normally PSTRotator uses 12040 for the first rotator, 12041 for the second, etc. However, any port that is free can be used. Write down the ports used as they are needed for PSTRotator or EA4TX configuration.
Send freq: Check this box if you need the radio frequency to be sent to PSTRotator.
Select the rotator software type from the drop down list, currently either PSTrotator or EA4TX
When completed, press OK.
To configure PSTRotator, you may need to refer to the PSTRotator manual. Here are the basic steps:
From the PSTRotator menu bar, Select Setup -> Trackers Setup -> DXLog.net/UR5EQF/LogHX Setup... The Setup form will be displayed:
Enter the port number used for this rotator in the Ethernet box. Select 'Azimuth' in the "Tracking by" box. Click Save Settings.
Select Tracker -> DXLog.net from the PSTRotator menu bar.
In the main display, select 'Tracking' from the Mode box. Depending on the view you have selected, you may need to select View -> Full View to see the Mode box. The following shows the location of the Mode box in PSTRotator:
If you have more than one rotator, repeat the steps on each instance of PSTRotator, using the appropriate UDP Port number. See the PSTRotator documentation to enable multiple instances of PSTRotator.
Once you have everything configured, return to DXLog. Ensure you are on the appropriate band (and the proper antenna selected). Enter a callsign or an azimuth value into the callsign field. Press Ctrl-F12. DXLog will show the value sent on the status line, and PSTRotator will (hopefully) rotate to the selected azimuth.
Enter a callsign and press Alt-F12. Rotator will move to the long path azimuth.
This completes Rotator configuration.
Configure network
This form allows configuration of network addresses and identification.
Station ID: The name of this instance of DXLog.net that will be shown on the Status window.
Server/Client IP: These entries define the server or client IP addresses. The client entry may be a fully qualified domain name of the server, limited to 100 characters.
Start number server: To allow usage of the number server (which allows reservation of serial numbers per station), check this box. Note: to enable the usage of the number server, it must be enabled using Options -> Networking -> Use number server.
Network is enabled
Enable or Disable networking feature
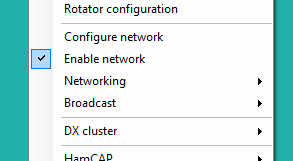
text command : NETON / NETOFF or NET / NONET
Networking
File:Options networking menu.png
- Synchronize CW messages
Initiate CW message synchronization to all network connected DXlog.net PC's.
- Don't log QSO on this PC
When checked, QSO cannot be added to the log at this PC.
Instead, the callsign entered into the log entry callsign field will be added to the bandmap and the log entry callsign field will be cleared.
This option is usually used for Partner mode or operator training.
- Software interlock
When checked, software interlock will be active.
Transmit is only possible if the other networked DXlog.net station's with network id selected during interlock activation is not transmitting.
Current blocking status is visible in Radio/Ant status window.
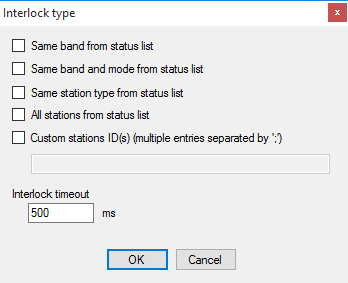
Interlock scenario depends on Interlock option selected.
- Interlock options
These options are effective when software interlock is activated.
 First one wins

 The First station which request a TX block via the network is able to Transmit.

 All other stations have to wait for the Transmitting station to stop transmitting and for the local DXlog.net to receive the TX unblock
 message via the network.
 Last one wins

 Last station which request block goes on TX but only when the unblocking request is successful.

 If your station is blocked by other one, your DXlog.net will send a unblock request to the blocking stations DXlog.net via the network.

 Only after your stations DXlog.net receives the unblock confirmation from the blocking station will a block request be sent to all other
 stations.

 When your stations DXlog.net receives confirmation of a successful block request from all other networked stations,then your station will
 be switched to TX.
 Last one wins if msg not or Last one wins if msg is

 These two options operate in the same way as the Last one wins option, but they must meet the additional condition defined in  If msg
 is/not selection option.

 For example:

 If the Last one wins if msg is option is selected and the F1 submenu option in If msg is/not selection menu is checked.

 Your station will be blocked by the F1 message from another DXlog.net station in the network (this usually means that the other station is
 calling CQ), then your DXlog.net
 can request an unblock from the CQ station, once the unblock has been accepted your DXlog.net will send
 a block command via the network and switch to TX.

 If your station is blocked by any other message except F1, your unblock request will be discarded and your station will have to wait for the
 blocking station
 to finish transmitting.

 If msg is/not selection options are:-

 F1-F7, INS, PLUS, KEYB, MAN Message selections for conditional Last one wins interlock scenarios.

 F1-F7, INS, PLUS are standard messages.

 KEYB - TX in keyboard mode.

 MAN - manual TX request (usually with footswitch).
- Computer DB9 Serial port footswitch information
Important:- For the software interlock to work in SSB mode, each stations foot switch must be connected to that stations DXlog.net PC serial port using the following connections:-
 Connect a 10k resistor between DB9 pin 6 and pin 7.
 In OPTIONS - CONFIGURE INTERFACES Set DTR, pin 4 to "Always On" and RTS, pin 7
 to "Always Off" for the relevant SERIAL port.
 Connect the footswitch between DB9 pins 4 and pin 6.

 The footswitch must not be referenced or connected to ground.

 The Radio must be connected to the DXlog.net PC via RS232 with options use CAT PTT command on Phone and Foot switch (pin 6) set
 to PTT


 File:K3 settings.png
- Use number server
When checked, the DXlog.net number server will be used to determine/reserve next serial number.
One DXlog.net station must be set as the number server, in the configure network menu, this is usually the main run station.
This is usable in multi op environment when serial numbers must be sent in sequential order (eg CQWW WPX M/S Category).
Number reservation is made when the spacebar is pressed in log callsign entry field.
If successful, user will be notified in main status window that the number has been reserved.
if a number is reserved but the qso isn't made, number reservation is cancelled when Wipe qso command is entered (ALT+W / F11 shortcuts).
Note: if you are using the number server on a single computer (for SO2R) you do not need to enable
the server/client selections. Ensure that the "Start server" and "Connect as client" checkboxes
are not selected. Simply check the "Start number server" box on the Configure Network
form and ensure that "UDP network broadcast" is enabled and configured with the broadcast address
for your computer's particular network setup. Selecting the "Default" button will calculate the
proper broadcast address for you.
- Don't allow QSO logging if number isn't reserved
When using the serial number server, QSO logging will be prevented if a serial number is not reserved from the number server. Also, when the number server is used and the reservation process has started, DXLog.net will show the active QSO NR as 000 until the new reserved number is successfully received or the reservation is canceled.
- The following are only relevant when 10 min band change rule is used in a contest (EG CQWW MS)
- Don't allow QSO logging if band change rule is broken
When operating a contest in a Multi transceiver environment, this option will prevent the contest band change rule being broken by stopping the mult station logging a QSO if the band change quantity has been exceeded.
- Show different active QSO line colour during wait status
When operating a contest in a Multi transceiver environment, this option will change the color of the active log so entry line when the band change rule is violated.
 E.G. You make qso on the mult radio on 40m band at 00:00Z..
 In that case, you have to stay with mult station on 40m until 00:10Z when you are then allowed to QSY to other band with the mult station.
 If you do it earlier, or you have multiple mult stations, each of them will see the qso line in a different color until the 10 minutes has
 expired. By default the colour is red, until last minute when it changes to yellow... and after that it reverts back to the normal background
 color of the logging screen.

 In multi/single environment it is very useful for each operator to see if a qso is allowed on that band or not. It's easy, you just have to
 look at the screen, and if the log entry line is red in color, you aren not allowed to make a qso. There are also timers visable in Status
 window, when a QSY is allowed.
- Don't allow QSO logging if operator isn't logged
If checked, logging is blocked if operator has not logged on.
- Show QSY notification in QSY Wizard
If checked, QSY notification will be shown in the QSY Wizard window.
- Use optimistic interlock blocking method
When software interlock is used, if blocking allowed response isn't received from all stations requested for blocking before timeout, we assume that other stations are blocked and TX is allowed.
DX cluster
Dx Cluster telnet settings and options
File:Dxcluster.png
Tick Reconnected default DXC at start to auto connect to DX Cluster on loading or creating a new log.
Select edit connection list to add, delete or update the telnet DXCluster connection settings.
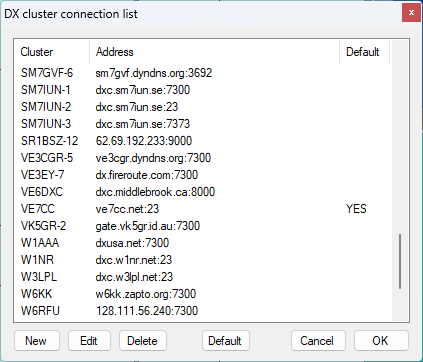
When editing or adding a new connection, give the connection a meaningful name and enter the address, either a Ip address or domain name, and the access port for the telnet connection.
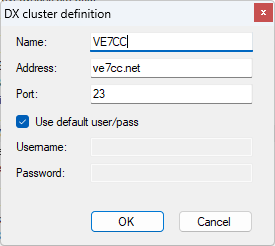
To set a default DX cluster connecton, select the connection from the list and click the Default button.
HamCAP
Hamcap and VOCAP must be installed for these options.
Download HAMcap from http://www.dxatlas.com/Download.asp and install
Download VOACAP from this web site: http://www.greg-hand.com and install
HAMcap is a HF propagation prediction tool and is useful for contest strategy and watching for possible openings for multipliers. VOCAP works in the background supplying HAMcap with the data it requires.
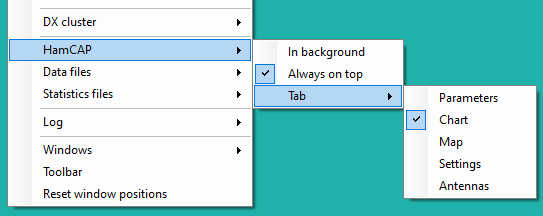
HAMcap options are:-
- In background - this runs HAMcap in the background of DXlog.net
- Tab - use this option to set which TAB of HAMcap is displayed when called by DXlog.net CTRL-P command.
To enable automatic HAMcap prediction by pressing SPACEBAR go to Options-> Networking-> Show QSY notification in QSY Wizard menu.
This option will work after you insert a call-sign in call field and spacebar is pressed.
Data files
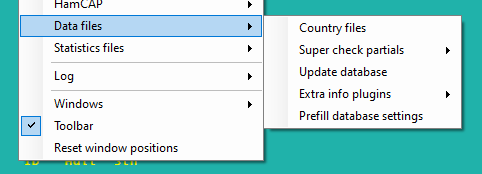
This menu is used to update the SCP and Country files from the internet and set Extra info and Prefill data base options.
We recommend updating the Country Files and SCP database before every contest
- Country files This command will open following window:
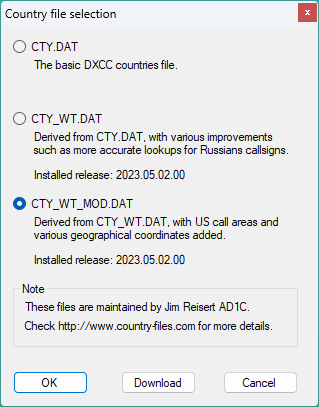
Here you can choose which of the country files you will use for calculation of DXCC, CQ zone, ITU zone etc. in the currently selected contest.
Click on Download to update selected country file from the internet and click OK.
After clicking OK, DXLog.net will ask you to reload the currently active log in order to refresh all calculations.
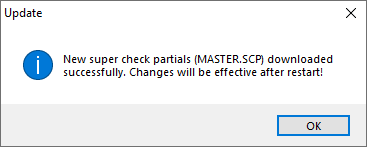
- Super check partials > Update, this command will update the Super check partials master.scp database to the latest version from the internet.
on successful download and update you will be ask to restart DXlog.net, this must be done to reload the master.scp database into DXlog.net.
- Update database Clicking this will update your local prefill database from currently opened log.
- Extra info plugins > HAMqth Enable or Disable, If enabled then a valid Username and Password must be set in the configuration window
- Prefill database settings
File:Prefill database settings.png
Single or multiple prefill database(s) may be configured using this form. Settings here override any Prefill database that is defined in the contest configuration.
To configure a prefill database, click 'Browse' and select the database. Indicate the type of database using the pull down menu. Native DXLog.net prefill database files are type 'txt'. N1MM+ Logger database files are type 'csv'. WinTest database files are type 'dtb'.
The prefill data is placed in the log line according to the selections in the 'Rcvd', 'RecInfo1', 'RecInfo2', and 'RecInfo3' settings. '1' is the first column of data, '2' is the second, etc. If you do not wish to prefill a particular entry field, select '-1'.
Log
Log display options
- Fonts - Increase or decrease the size of the log font.
- Headers - Enable or disable log column headers.
- Hide QSO numbers - Hide QSO numbers from Log, Useful in contests where serial numbers are not required to be sent.
- Always show mode in QSO line - Show or hide mode in Log, enable for multimode contests.
- Show date in QSO lines - Show date in QSO lines. This data is read only in the log line.
- Show frequency in QSO lines - Show the actual frequency in the log line in addition to the band.
- Show operator name in QSO lines - Show the currently logged on operator name in the QSO lines.
- Colors - Edit log background and text colors.
- Stay in field when moving up and down log - When editing log this option keeps the cursor in the same log field when moving up through the QSO's.
- In SO2R(V) use different background color - Use a different background color in Radio 1/Radio 2 (VFO 1/VFO 2) entry lines. The background color of the Radio 1/Radio 2 log line will be changed when the radio becomes active. The specific color must be configured in the Log window Colors menu.
Windows
There are two different way how DXLog.net handles child windows opened during the contest.
By default, all child windows are opened inside main window.
To be able to use dual monitors, you should enable Floating windows option.
In that case all child windows will be opened outside of main window and you can easily drag & drop them to desired position (for example on second monitor).
Toolbar
Enable or Disable DXlog.net toolbar
![]()
Restore windows positions
This option brings all windows back to the software default positions, useful if a window has been lost in a multi screen environment.
